Sunday 24 November 2013

A Champion for my Minotaurs

I've got enough Pendraken Minotaurs to make quite a few warband bases and have a chieftain and shaman as characters but felt I needed a champion that looked a bit different from the others. All the Pendraken ones are based three poses so I thought that I'd do a bit of converting with an Ogre by the same company.
And voila!

Minotaur Champion
I used Oyumaru to make a mould of one of the other Minotaur's faces; then cast a new head with Procreate. Having removed the Ogres' head, I superglued the new Minotaur face on and then built it up with more Procreate with a bit of wire added to form the horns.

Now I just need to think about creating a standard bearer.

Monday 18 November 2013

No One Would Have Believed in the Last Years That this World Was Being Watched Keenly and Closely by Intelligences Greater than Man's...

"Why, O why did you forsake us?" Abbot Crispin whispered as he knelt in earnest prayer on the cold stone floor of his private chapel. "Was our cause not worthy of you? Were you not glorified by our bloodshed?"
But there was no response form his god.
Instead the silence was interrupted by a sheepish knock on the door. 

The abbot sighed and beckoned the knocker in but soon regretted it as Brother Equile entered the room followed rapidly by the stench of the pig sty that he had just left.

"Yes, Brother, what do you want?" Crispin demanded impatiently, still finding it difficult to exercise the forgiveness that he so often encouraged his flock to embrace after the monk's treachery at the battle on the steppes.

"Father Abbot, I bring dire news" Equile announced his head bowed low.

"What is it, man?" asked the abbot, trying to fend of the smell of pig swill.

"A messenger has come from the next parish," explained the monk. "He speaks of creatures appearing from another plane - evil beings, soulless beings, followers of another god."

"Enough of your blasphemy!" the abbot shouted. "There is only one god. Get out and tell that foolish messenger not to spread such terrible lies or he will face excommunication."

The monk scuttled out the room. He had learnt not to challenge his superior. 
Turning his back on the closing door, the abbot wandered to the window and surveyed the  rolling landscape. In the distance he could see dark smoke billowing into the sky. But no, that wasn't smoke! They were dark flying beasts - creatures that he had never seen before. And as he looked on a troublesome dread crept upon him.

Once more Crispin fell to his knees: "Lord, we need your help. Do not abandon us in our hour of need."

Well, I enjoyed my recent game of Mayhem so much that I thought I would get going on another one straight away, though the battle may take a while to actually set up. And this time the creatures of Chaos are going to come to Crispin's homeland seeking to take advantage of the Crusader's weakness after their recent failed attack on the Orcs.

Once again, I've gone for armies of about 200 crowns and I've also adopted RRtK's idea where half of the crowns are used for a base army and then the rest of the crowns are spent on units which are selected by rolling dice. This allows a general to be sure of having certain units in his army but unable to choose the whole make up of it. Of course, this can mess things up a little as there were some units of my Chaos Army that I was hoping to give an airing to but they weren't chosen by the dice rolls and I'm afraid that I didn't manage to recruit the angels this time. Clearly Crispin's god is having one almighty sulk at the moment.

And so here are the armies:


The Crusaders
Abbot Crispin (the General)
Leadership D12
Move D6
CQ D20
BAR D20
General
Cost 10 Crowns

Brother Germaline (Hero)
Move D6
CQ D20
BAR D20
Hero, Spear & Shield
Cost 15 Crowns

Brother Equile (Hero)
Move D6
CQ D20
BAR D20
Hero
Cost 11 Crowns

Two Units of Knights
Move D8
CQ D10
BAR D10
Cavalry, Heavy Armour, Lance, Shield
Cost 26 Crowns

Two Units of Spearmen
Move D6
CQ D10
BAR D12
Spear, Shield
Cost 15 Crowns

One Unit of Crossbowmen
Move D6
CQ D12
BAR D12
Crossbowmen
Cost 16 Crowns

Five Units of Pilgrims
Move D6
CQ D20
BAR D20
Hordes
Cost 15 Crowns

Chaos
Major Demon (General)
Leadership D12
Move D12
CQ D8
BAR D8
Flyer, General, Terror
Cost 41 Crowns

Kronos (Hero)
Move D6
CQ D6
BAR D12
Hero, Axe
Cost 47 Crowns

One Unit of Chaos Knights
Move D8
CQ D8
BAR D10
Cavalry, Heavy Armour, Lance
Cost 29 Crowns

One Unit of Chaos Warriors
Move D6
CQ D8
BAR D10
Disciplined, Sword, Shield
Cost 21 Crowns

One Unit of Large Demons
Move D8
CQ D6
BAR D8
Behemoth, Terror
Cost 21 Crowns

One Unit of A Mass of Chaos
Move D4
CQ D20
BAR D10
Behemoth, Fear
Cost 16 Crowns

I'll stick up pictures when I get the battle going.

Time for a Commercial Break

With the building of armies comes spare figures so I have just stuck the following 55 figures on eBay with a starting price of 99p as usual.

You Know You Want Them...

Sunday 17 November 2013

Initial Thoughts on Mayhem

Well, I thoroughly enjoyed the game, even though it was a bit disjointed when the demands of life interrupted the flow. Even though the loss of the angels so early did rather make the result seem inevitable there were certainly several points in the battle where it appeared the tide could have turned.

The rules worked well for solo wargaming. Being used to the mechanisms of Two Hour Wargames, which are very much designed with the solo gamer in mind, I had wondered whether Mayhem would cope as well. I would say that they work better, albeit that I used 2HW's ideas for the layout of terrain and choice and deployment of troops. There is just the right balance of uncertainty and the greater number of options for troop design give much more variety so that I create the troops I wanted and make sure that there was sufficient differentiation between them.

I'm not usually a lover of lots of different dice but it does work here. And I particularly liked the concept of having to choose between "default" and "danger". Just to explain more fully, when it come to rolling dice, you can either not roll and simply accept the default score - half the potential score (2 for d4, 3 for d6, 4 for d8, etc) and you can go for danger and roll the dice so that you can achieve the maximum score but also the minimum. This is such a simple concept but, as some of my "wrong" decisions demonstrated, they can have catastrophic results.

And while on the subject of the dice, I couldn't believe the number of natural 1s that I rolled and again they tended to be at quite decisive moments.

As I say, the loss of the angels so quickly was decisive - the loss of nearly 25% of the army's points value. I had been looking forward to watching the carnage that they wrought amongst the orc riders but, thanks to a natural 1, it was all over for them. I do wonder about the quality of Terror that I had given them. The rules say that if a unit wishes to initiate combat with a unit that causes terror, it requires more command points to be used but if the terror-causing unit initiates the combat there is no effect as such. I would imagine that if you are attacked by a unit of terrifying creatures, there would be a tendency for some of your own ranks to turn and run.

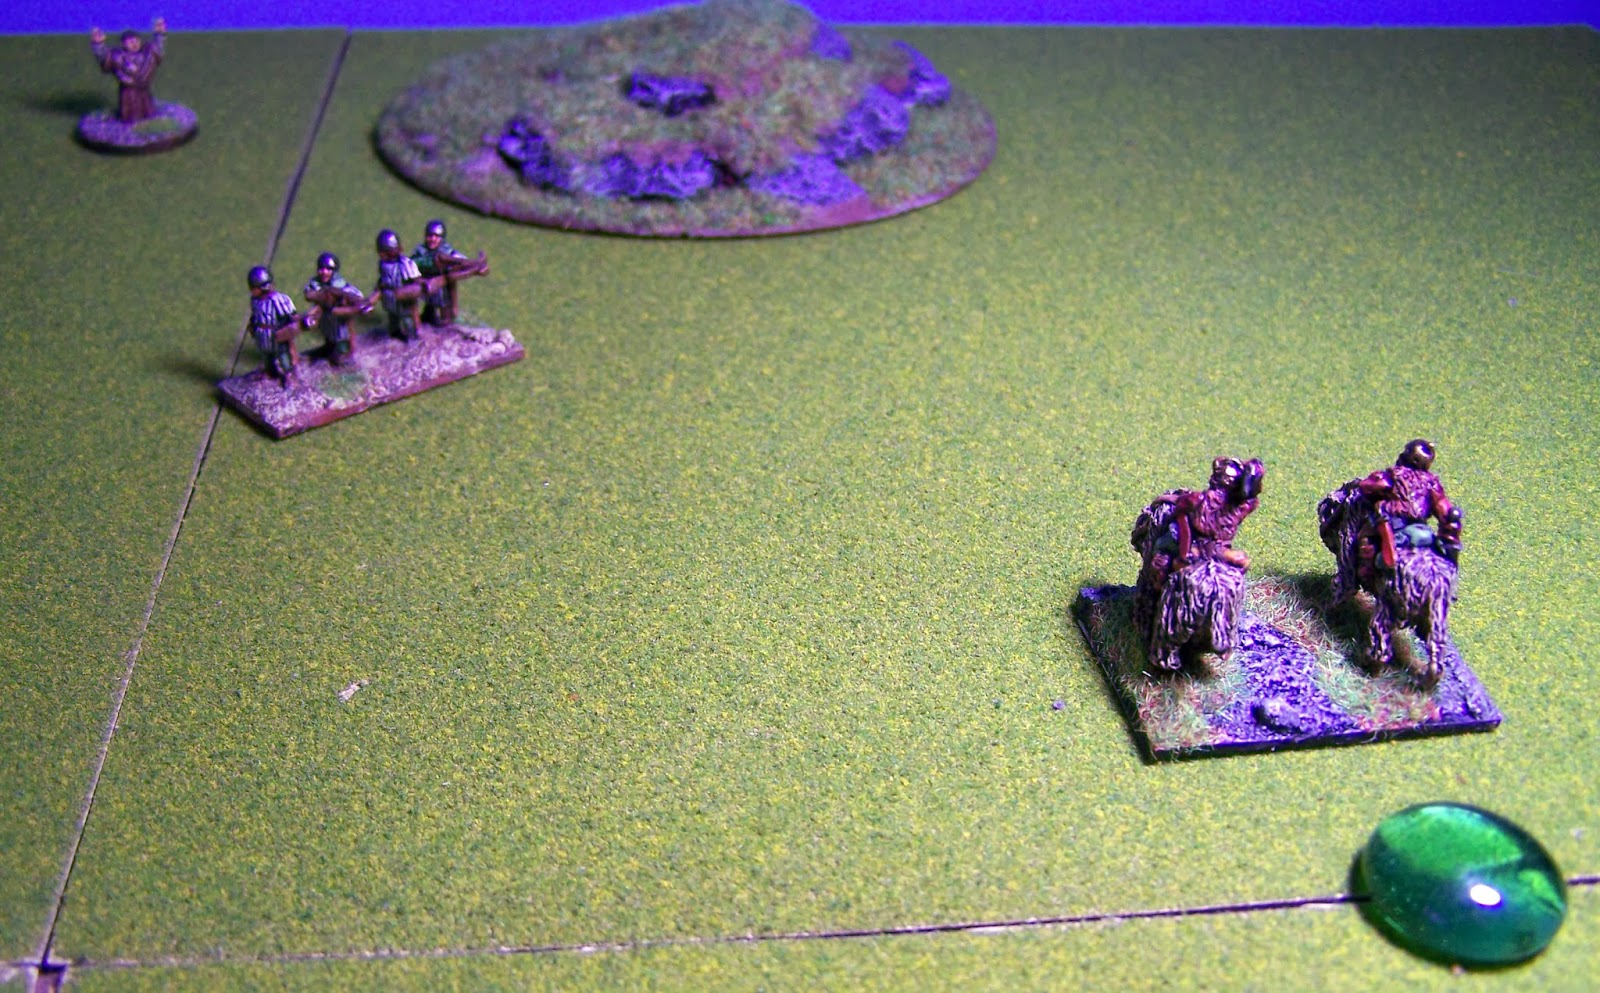
The pilgrims did far better than I had anticipated, especially as I had given them very poor statistics - a combat quality of d20 I thought would be a death sentence for them. I can see hordes being a real problem as they take so much to wipe them out.

I do like the way that the way units are destroyed differs depending on the type of troops they are - disorder, damage and attrition - though I found myself having to reread that section several times to make sure that I got it right.

I am not sure that I used the generals and heroes correctly. On a small board with 40mm bases there was never a problem of a unit going beyond the control of a leader so the orcs did not seem to be at a disadvantage by only having the one compared to the crusaders' three.

Of the rules themselves I would say that they could be better organised. There were times when I knew that a specific rule was in there somewhere but needed to trawl through them to find the clarification I needed. I have created my own quick reference sheet which helped. However, I recognise that part of my problem has been that I have got far too comfortable with the  mechanisms of Hordes of the Things and 2HW and this problem will no doubt dissipate as I get more used to them.
In the meantime I hope that Brent Spivey, the author, will correct me if I misinterpreted the rules anywhere.

Sometimes I felt the results were perhaps unrealistic (a fantasy game - realistic? Yeah, right!) particularly the way that the crusaders battled on even though they were reduced to just two units of  crossbowmen. Using the command point dice to decide whether they will break may not work as the higher value of the dice the less likely the army is to break and surely one sign of a good commander is knowing when the battle is lost and when to make a tactical withdrawal. Hence I felt that one of the Brothers had to make a move and risk demotion in his holy order.
And the way that you can carry out some actions with one unit, then move to another and then return to the first does feel strange. I like it as a game mechanism. It's fun and I can see how making the right moves at the right time can make a real difference in a battle but it didn't feel realistic. I couldn't see some of the moves I carried out happening on a battlefield while the enemy just watches on.

So in conclusion, I will certainly be using these rules again. They have been promoted to being my favourites for solo mass fantasy battles and I look forward to having a game with one of my sons to see what he thinks of them (he is used to beating me at HotT games).

Mayhem are not complete yet. Brent says that there is a third section coming soon-ish, covering strongholds, sieges, mini-campaigns, terrain and more and I am certainly looking forward to that coming out (especially as once you have bought the rules you can download the updated rules for free!)

And finally,what of the armies? The peace-loving orcs returned to the steppes, the chieftain's leadership still intact. Abbot Crispin went back to his chapel to reflect and question his god about what had gone wrong; Brother Germaline returned a hero and spent the rest of the year travelling the villages relating how god had blessed others through him, and Brother Equile, following his desertion from the cause, was guided to a new ministry in the pig sty.
Meanwhile, on another plane, the gods of chaos have been observing the foolish clerics' failures. Now is the time to move into the world of men. I just need to paint up my chaos general and heroes.

Saturday 16 November 2013

The Denouement

I'm finally back in the battle seat. Sorry, for the delay which was longer than I anticipated. So just to remind myself, I'd rolled an 11 for the Crusader's command points and used 3 of them.

Seeing that their opponents are shaken, the surviving pilgrim horde pressed on their attack (the riders are already disordered so this could be risky for them - another disorder and they are eliminated) and succeeds in wiping them out (another natural 1!).
The pilgrims battle on and defeat more riders
Suddenly the Orcs' left flank is looking a little dodgy. The Crusader's crossbowmen fire into the remaining ranks of riders but have little effect (I aimed, using two dice instead of one and while one did hit, it was the riders' turn to get a 1). Then finally the knights move in and hit the riders in the flank (that required a double move using up the final command points), causing them to be disordered but holding on
Finally the Knights join the Battle... but not for long
Encouraged by the limited success the abbot and his brothers in faith move closer to their troops, urging them to press on for the sake of the poor wayward souls of the orcs.
The End of Turn 3
Turn 4

Oh no, the tides have indeed turned! The orc chieftain is shaken by the attack on his left and hesitates. What should he do? For a moment the entire orc armed seemed at a loss.

I considered going for the default command points of 4 but, looking at that left flank and the fact that one units of the riders were disordered and needed to rally, I decided to go for danger and scored a 1. The riders couldn't even rally (that needed to points)
Seeing their brothers in danger and snarling at their leader's inaction, one of the other units of riders on the left flank decides to charge into the side of the knights and fortunately made it, saving the disordered riders and perhaps the day. Caught unaware the knights are thrown into disarray and slaughtered (another natural 1!) Surely, that is the end for the Crusader's adventures for this season.
The Knights are no more
Saddened by the loss of those worthy horseman, Abbot Crispin stills believes that he needs to continue. After all perseverance is a noble quality. I rolled one command dice to see if the crusaders would break but not yet - no 1 rolled that time. Two dice next turn if they make it that far. Then I rolled an 8 for actual command points for this turn.

"Come on, my Braves! "shouts Brother Germaline from behind the protection of the crossbowmen. "Remember god is on the side of the just and merciful. Slaughter them!"
The pilgrims do not need to hear any more and charge into the disordered riders and defeat them. Another natural 1 (are theses dice loaded?)
Once more the Pilgrims attack
The crossbowmen move up alongside the pilgrims, take aim and shoot but again fail to have any tangible effect the other unit of riders.
The Crossbowmen take aim and fire
Meanwhile the crossbowmen on the other flank advance and fire at the surviving riders and have more success, forcing them into disorder.
Turn 5
The orcs look to the chieftain, who has cleared his head and urges his men on. I'm definitely going for the default this time!

One unit of riders on the left flank charge the crossbowmen while the others seek to make contact with the pilgrims. Finally the brave troop of happy pilgrims cave in and go to meet their maker while the crossbowmen are disordered.
The pilgrims finally meet their match
On the other flank the remaining riders stay still disordered while the chieftain orders a general advance to his nobles and the trollkin.
The abbot still wants to fight on (two dice thrown and still no 1). Even the brothers are beginning to question his sanity.

10 command points this turn. The two remaining units could practically do a lap around the battlefield with that many points between them! :)
The crossbowmen kill off the riders...
Brother Equile orders his crossbowmen on the crusader left flank to finish off the riders and finish them off they do (with another natural 1) so they turn and fire into the advancing trollkin but, rushing to get the second shot off, their bolts fail to hit their targets.
and then turn their attention on the Trollkin with less success
On the other flank, Brother Germaline urges the crossbowmen to fight off the riders but to no avail (another natural 1, this time for the riders).

Three command points left and time for a bit of realism..
In a fit of conscience and disobedience which will no doubt require many months of penitence, Brother Equile decides to order the one remaining unit of crossbow to return to their homes, leaving Brother Germaline and the Abbot to practice the art of apologetics with the remaining orcs.

Well, I enjoyed that. I'll post again soon with my thoughts on Mayhem.

Wednesday 6 November 2013

The Battle Continues

Turn 3
Encouraged by the angels demise the Orc Chieftain pushes forward with the attack (and rolls 5 command points). The two hordes of pilgrims that stalled in their charge against the Trollkin are cut off and vulnerable so the Trollkin charge them (I am assuming that that cost 1 cp for each unit as it is a charge rather than an advance). The fight was very one-sided and the Trollkins soon routed the pilgrims.

The Trollkin charge into the Pilgrim Hordes


I've decided to use default for the Trollkin, forcing the two pilgrim hordes to roll under 4 on d20's. Both fail (13 and 18) and are damaged and beaten back by 9 and 14 inches respectively, causing the latter to rout off the board completely while the former has 9 damage tokens placed on him. 

As the surviving pilgrims raced back the right flank Orc riders seized the opportunity and charged into the rear of the fleeing men, who fought bravely to protect their rear but they are no match. Not a hope really - the riders caused another damage token so the horde had to roll under 13 with ten dice...yeah right!

Riders charge into the rear of the pilgrim. No wonder Brother Equile throws his hands up in horror!

On the left flank two of the units of Orc riders charge into the remaining two pilgrim hordes causing more damage to them (both now have 5 damage dice on them) though they fight bravely on.

 
And the Orc Riders on the left flank charge into the remaining Pilgrim Hordes


Not disheartened by the minor setback, Abbot Crispin presses on with the attack. After all, just one saved soul is worth the martyrdom of millions (he is sure he has read that somewhere in the scriptures!)

The Crusaders get 11 cps which is going to keep them busy with their depleted numbers but now another pause while I put my son to bed. I hope to be back later today. OK I'm back but not for long.

The remaining pilgrim hordes continue the fight against the Orc Riders and have mixed results. One takes more damage and it is sufficient for it to be destroyed but the other manages to get the better of the orcs and throws them into disorder.

Meanwhile on the other flank the crossbowmen decide to take a shot at the Riders who are bearing down on them and perhaps their god is going to bless them after all as the flying bolts rip into the riders and their beasts (a natural 1!)

Sorry, Folks, I ran out of time today. We'll have to wait until next Thursday to discover if the Crusaders can make a miraculous comeback.


Let Battle Commence

Playing this solo, I used dice rolls to lay out the scenery which, as you can see, rather messed up the Nomadic Orcs's initial deployment. And I used RRtK's rules for deploying the troops, classing the Nomadic Orcs as a 'B' type - mainly mounted and fast - and the Crusaders as an 'A' type - heavily reliant on melee troops albeit they're rubbish pilgrims!

Rolling for who would move first, the Nomadic Orcs got the upper hand and for the first go, decided to live dangerously for the command roll - got the maximum 8 and that was even forgetting that I could roll more than one die (I must withdraw myself from HotT mode!)

The Initial Layout
  
Angels and Crossbowmen on the Left Flank
Pilgrim Hordes with Abbott Crispin and Brother Equile

 
More Pilgrim Hordes with Brother Germaline
 
Knights and Crossbowmen on the Right Flank
 
The Orc Right Flank
 
The Orc Centre with Trollkin, Chieftain and Orc Nobles
More Orc Riders on the Left Flank
 Turn 1
Deciding to take the initiative, the Orc Chieftain ordered a general advance
and riders moved forward at a furious pace with the units on both flanks seeking to get around the sides of their enemy.

I decided to  go dangerous with all the units and all scores were average or above (why can't I roll like this when I play my son?). Lastly I moved the Chieftain - 3!

Taken aback by the enthusiasm of his troops, the chieftain decided to play it a little more cautiously.

The Crusaders' turn and the command roll is also good - 11 (again I forgot to roll more than one die...grr). This could be a short game.

Encouraged to see the Orcs moving forward to embrace their holy enlightenment, the Abbot also proclaims a general advance and the pilgrims singing the latest battle hymn rush headlong towards the centre of the enemy.

The crossbowmen also move forward and let fly with their bolts at the flanking Orc riders, hopefully softening up their ranks for the angels and knights. The crossbowmen on the right flank miss their target (dangerous roll of 2) but those on the left flank hit their much closer enemy (only 5" so default will suffice) throwing one unit into disorder. Seeing their opportunity to swoop down upon the shaken enemy the angel host cry out with a loud voice and edge forward (tried a charge move and rolled two 2's!). Meanwhile the Abbot and monks, being men of peace, followed the angels' example and moved forward just enough to show that "we're all in this together" (rolled two 1's and a 4 - might go for default in the next turn).

Turn 2
I decided to try default for the Nomadic Orcs so 4 command points - rally the unit hit by the crossbows (2 points) and charge (2 points). That's that for this go!
 
Angered by the crossbowmen, the Orc riders rallied and charged into their attackers and this time it is the crossbowmen's turn to be disordered (4 & 7 v 11).

Orc Riders Chanrge into the Crossbowman
 
I managed to remember the multiple dice roll and scored 10 for the Crusaders' command points.

The crossbowmen, not too happy about getting into hand-to-hand combat, rally and quickly disengage (5 cp) shouting to the angels "We've softened them up. They're all yours for the taking!" as the host passes overhead. The angels need no more prompting and this time sweep in for the kill (just making it!)  
 
The Angelic Host sweeps in for the kill

The fighting is intense but not surprisingly the riders go under the furious onslaught from above. What is surprising is that the angels also are destroyed. Oh dear! The angels' 3d4 get 1,2 & 4 but the Orcs' 1d10 also gets a 1. I wasn't expecting that!

Meanwhile the pilgrims, wanting their moment of glory (or martyrdom) continue to rush forward against the enemy but perhaps shaken by the departure of their supernatural allies fail to engage. Unbelieveable - 2 inches away and for my charge I roll two 1's!
Two 1's!
The abbot and the monks sensing unease in the ranks advance a little quicker this time to bolster up the ranks.
The Situation after Turn 2
 There will now be a short interlude while I go and do the weekly shopping. :)